How to Build a DIY Milking Table (And Why Most People End Up Buying One Instead)
A real, step-by-step guide to building your own, plus the honest truth about why most builders become buyers.
Shop Milking Tables âIn This Article
Who This Is Actually For
Let's be real: building a milking table isn't for everyone. This guide is for people who:
- Have DIY experience or aren't afraid to learn as they go
- Want to save money on upfront cost (you will, initially)
- Are patient with a 4 to 10 hour build
- Have access to basic tools (drill, saw, staple gun)
- Care about customizing dimensions or finishes
If you want to skip straight to "what should I actually buy?" jump to the verdict section. We won't judge. Spoiler: most people do.
What You'll Need
Here's the complete materials list. Don't try to cheap out on the foam or fabric, it shows immediately.
Core Materials
- 3/4" plywood or MDF sheet (at least 24" wide x 60â70" long)
- 2â3" high-density foam (the thicker the better)
- PU vinyl upholstery fabric, non-porous (medical or faux leather works)
- Hole saw, 4â6" diameter for round hole OR jigsaw for rectangular
- Heavy-duty staple gun with 3/8" staples
- Sandpaper: 120 grit and 220 grit
- Folding table legs OR adjustable aluminum legs
- Wood bolts, washers, and wood screws (1.25")
- Wood stain or paint (optional, but recommended for aesthetics)
- Polyurethane finish for water resistance
Optional but Smart
- Privacy curtain rod and blackout or sheer curtain
- Furniture pads or felt for leg bottoms
- Contact cement (makes fabric application cleaner)
- Table padding under joints for noise reduction
Total Cost Estimate: $80â$200* in materials, depending on wood quality and whether you already own tools.
Step-by-Step Build Guide
This process takes most people 4â10 hours depending on tool confidence and available help. Set aside a full day. Work in a ventilated space.

Cut Your Plywood to Size
Start with a 3/4" plywood or MDF sheet. Standard dimensions are 24" wide by 60â70" long, but you can adjust based on your space and leg style.
If you're not comfortable crosscutting large sheets, most home improvement stores will make one or two cuts for free or a small fee. Use this.
Mark and Cut the Hole
Decide on your hole: round (easier, 4â5" diameter) or rectangular (more versatile, roughly 4" x 6"). Mark the center of where you want it, typically 6â8" from the head end.
For a round hole, use a hole saw. For rectangular, use a jigsaw. Drill your starter holes first, then cut slowly. Rushing here causes mistakes.
Sand Everything Thoroughly
Sand the entire board with 120 grit sandpaper, paying special attention to the edges and hole. Then go over it again with 220 grit for smoothness. This step matters more than people think, especially around the hole edge where contact happens.
Use a sanding block or orbital sander if you have one. By hand takes longer but works fine. Vacuum or wipe away all dust when done.
Cut and Layer Your Foam
Cut high-density foam to match your plywood dimensions. Use at least 2", ideally 2.5â3". If your foam is thicker than what you need, you can shave it with a hot wire foam cutter or sharp utility knife.
Lay the foam on top of the plywood. You can use contact cement to glue it down, or just let it sit snug. If it shifts, use spray adhesive to tack it in place.
Wrap and Staple the PU Vinyl
Lay your PU vinyl out flat. Place your foam/plywood assembly on top of it (foam side down). Pull the vinyl tightly over the edges and staple it to the underside of the plywood using a heavy-duty staple gun.
Start by stapling the four corners, then work along each side every 2â3 inches. Keep tension even. Wrap the vinyl carefully around the hole, pulling it snug to avoid sagging or seams right at the hole edge (that's where moisture collects).
Fold the vinyl around the hole carefully. You can make relief cuts from the edge toward the hole if needed, but seal those with a flexible waterproof adhesive afterward.
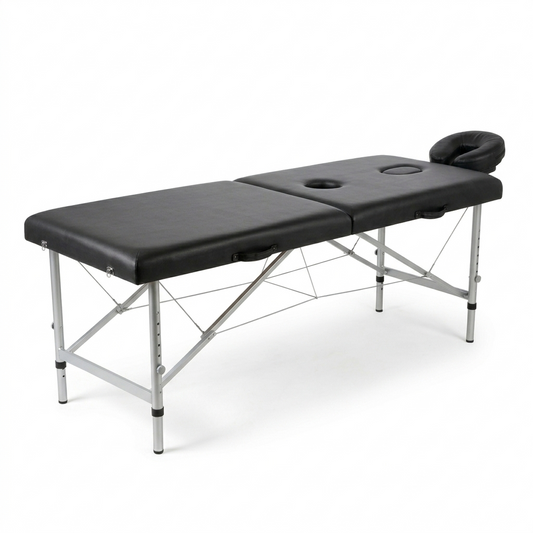
Attach Your Legs
Position your table legs underneath the plywood and secure them with bolts and washers. Folding legs are ideal because you can collapse the table for storage. Adjustable aluminum legs are more stable.
Drill holes through the plywood and leg mounting plates, then bolt them tight. Make sure everything is square and the legs don't wobble. If legs wobble, tighten every bolt before using the table.
Add felt pads or furniture sliders to the leg feet to protect your floor and make moving easier.
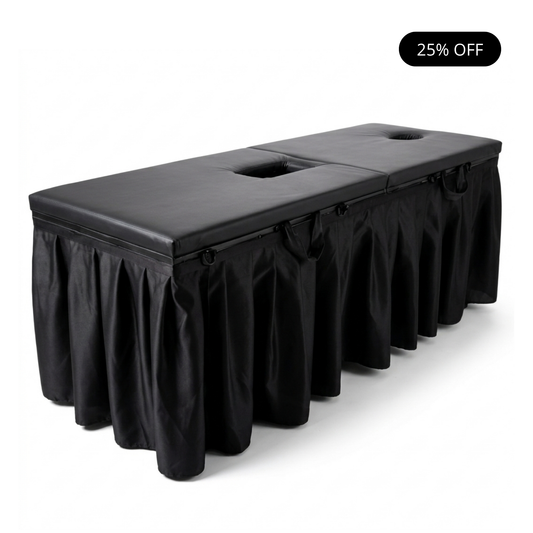
Optional: Add a Privacy Curtain
If you want a curtain, install a rod along one side of the table using brackets. A simple blackout or semi-sheer curtain gives you privacy and can define the table's aesthetic.
Use a lightweight curtain rod and rings so it's easy to move aside. You don't need anything heavy here.
Total time: 4â10 hours depending on experience and tool access.
Common Mistakes (Don't Be These People)
Hole Too Small
Most first-timers underestimate how much space they need. A 4" hole sounds okay until you're dealing with anatomy and comfort. Go bigger than you think, round or rectangular.
Foam Too Thin
1" foam feels cheap. The table will feel hard, compress quickly, and you'll regret cutting costs. Use 2â3" minimum. It matters.
Vinyl Seams Over the Hole
Placing seams directly at or over the hole means moisture collects there, vinyl cracks, and you're looking at replacing the fabric in 6 months. Pull the vinyl around the hole smoothly.
Wobbly Legs
Cheap hardware equals a wobbly table. Bad time. Invest in solid bolts, lock washers, and periodically retighten them. A wobbly table is both uncomfortable and unsafe.
Not Sanding the Hole Edge
A rough hole edge catches and tears skin. Sand it smooth, even inside the hole if you can reach it. This is a direct comfort issue.
Making It Too Heavy to Move
If you can't move it by yourself or with one other person, you built it wrong. Use lightweight foam, skip the concrete base, and pick legs that fold or adjust easily. You'll need to move it for storage or cleaning.
Skipping Wood Stain or Sealer
Raw wood shows stains. If your plywood edge is visible (some designs), stain it to match or seal it. Polyurethane on the underside (where it won't contact skin) protects the wood from moisture over time.
The Honest Verdict: DIY or Buy?
If you made it here, you're probably thinking: "This is doable. Should I actually build this?"
Here's what we see happen in the real world:
Why You Might DIY
- Cost: You'll spend $80â$200* in materials vs $319*+ for a manufactured table.
- Customization: Build exactly what you want, size, color, foam thickness.
- The Process: Some people genuinely enjoy building. If that's you, go for it.
Why Most People Buy Instead
- Time: 4â10 hours plus shopping for materials adds up. A ready-made table ships in days.
- Durability: Professional manufacturing means better seams, better foam, better stability. DIY tables often show wear in 12â18 months.
- Warranty & Support: Our manufactured tables come with support. Your DIY build? You're on your own if something breaks.
- Aesthetics: It's harder than it looks to make a table that looks polished and professional. Seams show, foam compresses unevenly, legs can look cheap.
- Feature Access: Our designs include features like adjustable height, curved bases for partner access, and premium upholstery you can't DIY for the same price.
- The Real Savings Myth: You save maybe $100â$150* in material cost, but invest 8â10 hours of your time. Is your time worth less than $15*/hour? For most people, buying makes more financial sense.
Bottom line: If you enjoy the process and have the time, build. If you want something that works, lasts, and looks great immediately, buy.
Shop Ready-Made Options
No time to build? No worries. Here's what we make.
3/4" plywood or MDF (medium-density fiberboard). Plywood is more durable long-term; MDF is easier to cut and finish. Avoid anything thinner than 3/4", it won't hold up to stress. Don't use particle board, it degrades quickly with moisture.
Can I make it foldable?+
Yes, if you use folding table legs. They're sold at hardware stores and collapse for easy storage. Just make sure they're rated for the weight and lock securely when extended. Professional folding legs will work better than cheap ones.
How do I make sure the hole is the right size?+
Round holes are typically 4â5.5" diameter. Rectangular holes are roughly 4â5" wide by 6â7" long. Start smaller and sand it larger if needed. You can't make it smaller once it's cut. Consider your anatomy and comfort needs, then go slightly bigger than you think.
Is PU vinyl the right material?+
Yes. PU vinyl (polyurethane vinyl) is non-porous, easy to clean with soap and water, and durable. Avoid natural leather, which stains easily and requires special care. Faux leather works if it's specifically labeled as non-porous or medical-grade.
How long does a DIY table actually last?+
Depends on build quality and use. Most DIY tables hold up 12â18 months with regular use before foam compresses, seams start peeling, or legs loosen. Professional tables are built for 3â5 years with proper maintenance. The difference is in seam quality, foam density, and fastener strength.
Is it actually cheaper than buying?+
On materials alone, yes, by maybe $100â$150*. But factor in your time: 4â10 hours of labor plus the risk of mistakes or needing replacement parts. If your time is worth more than $15â$20* per hour, buying makes financial sense when you account for the finished product's durability ang the hole straight and wrapping the vinyl evenly without getting seams over the hole. If you've never built furniture before, expect the first one to take 8â10 hours. Your second would take 4â6.
What's the best wood to use?+
3/4" plywood or MDF (medium-density fiberboard). Plywood is more durable long-term; MDF is easier to cut and finish. Avoid anything thinner than 3/4", it won't hold up to stress. Don't use particle board, it degrades quickly with moisture.
Can I make it foldable?+
Yes, if you use folding table legs. They're sold at hardware stores and collapse for easy storage. Just make sure they're rated for the weight and lock securely when extended. Professional folding legs will work better than cheap ones.
How do I make sure the hole is the right size?+
Round holes are typically 4â5.5" diameter. Rectangular holes are roughly 4â5" wide by 6â7" long. Start smaller and sand it larger if needed. You can't make it smaller once it's cut. Consider your anatomy and comfort needs, then go slightly bigger than you think.
Is PU vinyl the right material?+
Yes. PU vinyl (polyurethane vinyl) is non-porous, easy to clean with soap and water, and durable. Avoid natural leather, which stains easily and requires special care. Faux leather works if it's specifically labeled as non-porous or medical-grade.
How long does a DIY table actually last?+
Depends on build quality and use. Most DIY tables hold up 12â18 months with regular use before foam compresses, seams start peeling, or legs loosen. Professional tables are built for 3â5 years with proper maintenance. The difference is in seam quality, foam density, and fastener strength.
Is it actually cheaper than buying?+
On materials alone, yes, by maybe $100â$150*. But factor in your time: 4â10 hours of labor plus the risk of mistakes or needing replacement parts. If your time is worth more than $15â$20* per hour, buying makes financial sense when you account for the finished product's durability and support.
What should I use to clean a milking table?+
Warm soapy water and a soft cloth. For stains, use mild disinfectant wipes or a solution of water and white vinegar. Avoid harsh chemicals that can degrade the vinyl. Dry thoroughly to prevent moisture buildup under the foam. Never soak the wood underneath.
Ready to Stop Researching?
Our tables come tested, supported, and ready to use. No assembly required.
Shop Milking Tables* Prices shown are approximate and may have changed since this article was written. Always check the retailer's website for current pricing. Product descriptions, comparisons, and specifications for third-party brands are based on publicly available information at the time of writing and are provided for general reference only. Home in Bold does not guarantee the accuracy of competitor product details.